Catrina's Garden

A place for gardeners, foodies and garden inspired artists.

Salsa Gardening – Before the Thaw

Child with tomatoGetting the family involved in gardening is a popular quest. The challenge is how to get the kids interested. Have you ever thought about planting a SALSA GARDEN?! Although your children may not love tomatoes and peppers (and onions, garlic and herbs) individually – once they realize when you put them all together it makes salsa – their interest will peak! Growing the ingredients to make this delicious dip will be rewarding whether you have little hands helping or not. Imagine the delight of your friends at a picnic gathering when you tell them your salsa was not only made from scratch, but you even grew the vegetables! How “green” of you!

Seed packets 2This fun project lasts all year, from planting to eating! So let’s get started–in our northern Wisconsin climate, your tomato and pepper seedlings should be planted now, indoors! You could have actually started the peppers a while back because they don’t outgrow their pots as fast as tomatoes.

Let’s talk tomatoes today. The best tomatoes for Salsa are paste types. Everyone is familiar with the old standard–the Roma–but there are dozens of heirloom paste tomatoes available. Great varieties to Tomato (10)1Corno-De-Toro-Pepper-225x300look for are: Amish paste, Opalka, Long Tom, Principal Borghese, San Marzano, Oxheart or Bull’s Heart (a really large paste tomato). Gildo Pietroboni is a little hard to find but this Italian paste is twice as big as a Roma and well worth the search when it comes to flavor. Add some fun to your tomato quest by making your salsa different colors with: orange, yellow or black Oxheart; Black Prince; Yellow, Green or Cream Sausage; Speckled Roman; Orange Banana or White Wonder tomatoes.

Next, the peppers; some great pepper varieties for a milder salsa are any of the Marconi’s, Hungarian Wax peppers, Poblano’s, Bermuda’s, or Ortega’s. You can get the crunch and look of a Jalapeño without the heat if you use Fooled You Jalapeño’s.  If you like it hot(!), consider using Cayenne’s, Tabasco’s, Serrano’s or the hottest…Habanera’s. Many of the ornamental pepper varieties that have variegated leaves like Fish, Trifetti, Masquerade and Black Pearl are also quite hot.

Now, the growing! Growing your seedlings is easy, really! The key is to start with the right ingredients.

  • Clean your potsUse jiffy mix or another super lightweight soil especially designed for seed starting. This will help prevent your seedlings from rotting; otherwise known as “damping off”. You can also use one of the prepackaged seed starting kits.
  • Start small. It’s easy to end up with way too many plants. But if you do, just share the extras with your family, friends or neighbors!
  • Very important. Clean your pots if you are reusing them. Seedlings are very susceptible to damping off, which is a fungal disease that causes them to simply rot and fall over. This is how I do mine, but you can wash them by hand if you wish.
  • Sprout seeds with bottom heat
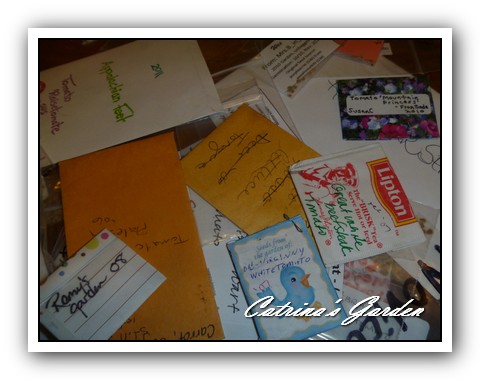
Most important, the seeds; needless to say, I LOVE SEEDS, they have such potential. Don’t you just marvel in how a huge plant can spring from this small piece of life?
  • Use bottom heat to get the seeds to sprout. Any warm place like the top of the refrigerator or an old-fashioned radiator will do. I use the bathroom floor as I have heated tile. My hubby wanted to know why I need the heating cables under the sink.
  • Water from the bottom too. Place water in the bottom tray, not on top of the soil.
  • Spring Seedlings1Move the seedlings to a bright window or under artificial lights as soon as they sprout (shop lights work well but lower the lights so they are just a few inches from the plants).
  • Thin the seedlings so they’re not crowded as they grow and move them to a bigger pot when they start to get big. Be ruthless; I know it’s hard. No one wants to kill their babies. Give some to your friends if you can’t do it.
  • Every time you transplant tomatoes plant them deep so only the top of the plant is sticking out of the soil. They’ll develop roots all along the stem and become strong. 7. Don’t plant your plants outside until it’s good and warm–but gradually set them outside to get them used to the outdoor weather. Bring them in on cold nights. Pepper plants are more susceptible to cold weather.

If you don’t want to take care of seedlings all winter never fear! It’s okay to purchase your seedlings. Be sure to check back and see what other ingredients you will need for your salsa garden!

Blaukraut (German Red Cabbage)

(adapted from “my family”)
This was one of the vegetables that I actually liked as a kid. My grandma made it so when I started gardening “Red Acre” was one of the first things I grew.

Here’s the original recipe and you can see how I updated it below.

Ingredients:

1 medium head red cabbage, shredded
1 tablespoon olive oil
1/3 cup red wine
1/2 medium onion, finely chopped
1 apple, peeled, cored and finely chopped
2 vegetable bouillon cubes
4 tablespoons apple cider vinegar
1 teaspoon sugar
1 cup water
Kosher Salt and Pepper


Preparation:

Heat olive oil in a large pot over medium heat. Add the onions and saute until translucent. Add the 1/3 cup of red wine. Add 1/2 of the shredded cabbage, 1/2 of the apple, 1 bouillon cube, 2 tablespoons wine vinegar, 1/2 teaspoon of sugar, 1/2 cup of water, season with 1/2 teaspoon of salt and 1/8 teaspoon of pepper. Repeat the layer adding the other half of the ingredients in the same fashion.
Give a quick stir, cover and simmer for about 20 – 30 minutes or until the cabbage is soft. At this point stir, taste for seasonings and adjust if a little more salt and pepper is needed.

For each cabbage used I increased the wine to 1/2 cup, and used a whole onion instead of a half. I caramelized it instead of cooking to translucent. I also used 2 apples instead of one and added a can of mandarin oranges and their juice. If you can find the natural kind they are the best. I used more vinegar than called for and instead of apple cider vinegar I used white wine vinegar in which I had steeped osmin basil for about a month. I love this stuff. I didn’t add any extra water because of the extra wine and the orange juice. Lastly I substituted a little less than 1/4 cup of agave nectar for the sugar.

Served with a pork chop and some parsley buttered noodles…comfort food.

Caring for Daylilies

Daylily Bright Sunset (4)1Now you have a gorgeous array of daylilies.  All colors sizes and forms, with eyes and ruffles. So how do you care for these beauties?

The good news is…it’s easy! Daylilies don’t require a lot of attention. Much of the care that is described here is optional. They will do just fine if you don’t do it.

Hemerocallis

This is the Latin name for Daylily. It is from the Greek: HEMÉRA (day) KÁLLOS (beauty).

Daylily Christmas Ribbon1Planting

The first step is to get them planted correctly in a good spot. If you missed it check out this article about how to plant your new daylilies.

Watering

Your daylilies actually can go for a period of time between watering. They will flower better and have less dried up foliage around the base with regular watering but will most often do fine with less. There are most likely other plants in your garden that need more water than the daylilies, so use them as an indicator of when watering is needed. Of course, if they are freshly planted you will want to water them more often. It is better to give them a soaking so that the moisture penetrates at least 10 inches into the soil, than to water a little bit every day. Of course you will not be able to help it if you are lucky enough to have rain, but overhead watering can cause spots on any flowers that are open and sometimes even the next day’s blooms. You could prevent this by using soaker hoses. Ideally they would get watered if there is not an inch of rainfall in a week.

Daylily Helen Shooter and marguaites1Fertilizing

Daylilies grow in a wide range of soils and conditions. Fertilization practices differ widely from gardener to gardener.  Certainly you will get better bloom if your soil is more fertile but truly, daylilies are amazing in nearly any soil. If you like to use fertilizer please follow the instructions on the label. Too much fertilizer will grow lots of leaves and fewer flowers. Daylilies do fine with a wide range of soil pH. I recommend a soil test before adding anything that would change the pH like lime or sulfur.  If you garden organically, like us, you will find that almost any soil can be improved with a little compost. I work some in when I plant and use as a top dressing. Leave it a little away from the crowns to prevent too much moisture from collecting there. If would be great to do it every year but in reality if you don’t get to it you will be fine. We get through all of our beds about every other year.

Daylily Little Bumble Bee 2Mulching

Mulching is not essential but it does help the soil to retain moisture and help to keep the weeds down. I recommend organic mulch like wood chips, shredded leaves or clean straw, which will break down in time essentially becoming compost and contributing to the fertility of the soil. If using wood chips let them age a bit before spreading.  Fresh green chips can actually rob some nutrients from your plants as they decompose. This really only happens in the top inch of the soil so big established plants won’t mind, but seedlings or small plants may. Mulches that are not recommended include dyed wood chips (unnecessary chemicals) and plastic mulch. Please don’t use plastic sheet for mulch. Landscape fabric is okay but I still don’t recommend it. Here’s why:

  • Less water will get to your plants; especially with plastic but even with landscape fabric they get less.
  • Your soil gets hotter. Think of what happens with your black car or if using clear it can have a greenhouse effect. Plastic is used to kill weeds. Why would you do this to your nice plants?
  • The weeds will eventually come through…believe me they will, and then you will have to rip out your work and start over. This is even worse if you put rocks on the top. Think of the time you will have to spend picking out the rocks by hand when your fabric is shredding.
  • It kills worms, or at least makes them go away.
  • When you pull it up you will see that your soil is dead. All microorganisms and organic matter is gone.
  • Your plants are not going to stay exactly as they are when you plant them. They are going to grow and the little hole that you cut is going to strangle them. They are going to end up trying to grow under the plastic and get suffocated or they will spread out on top where there isn’t any soil for them.
  • You may want to move them around.

Daylily LIttle Rusty (2)1Controlling Weeds

We all know that weeding is a part of gardening. Weeds can rob water and nutrients from the good guys. For sure get them before they go to seed, and be diligent about perennial weeds or they can take over. Let’s face it, weeds aren’t as pretty as no weeds but it is really a matter of how fastidious you are, how much time you have and how many plants you have.  A few weeds aren’t going to kill a daylily. Mulching will decrease the amount of hoeing and hand removal that you will need to do.

Grooming and Sanitation

Keeping your garden neat and tidy really goes hand in hand with weeding, and has the same real life constraints on it. You’re daylilies will likely do fine if you don’t do it. If you are having problems with insect pests or disease, removing dead foliage and debris from around the crown can help combat these problems. But when it comes down to it, really, it’s a matter of making them look their best. So, this being said I usually tell people that if it doesn’t look good, remove it.

  • Remove any foliage from last year in spring.
  • Remove any foliage that is turning brown, or is damaged throughout the growing season. This can be done as infrequently or as often as you like to keep your plants looking nice.
  • Though it is not a problem to miss a day or too, deadheading has become a ritual for me. It gives you a chance to go around each day and see what’s blooming. I usually do my photography at this time too. It’s a relaxing thing to do with a cup o’ java.
  • If you hybridize, of course you will need to leave the pollinated, hopefully marked, blooms on until a seed pod forms.
  • After all of the buds on a given scape have bloomed you can cut the scape off to a few inches above the soil. This may help your plant send up another scape and re-bloom. You will of course want to leave the scape if it has a pod on it and you want to try starting daylilies from seed.

Daylily Wilson's Spider1Dividing

There are sources that give you specific recommendations on when to divide you plants. About every 5 years is what I often hear. There are thousands of daylily cultivars out there and each one will perform differently in different gardens and different geographic areas. What I will say is that if your plant is preforming well then you can leave it and your clumps will become impressive. If it is not flowering as well as it used to, or you want to give some to a friend, then consider dividing or moving it. Each fan can become a new plant but I like to leave 6 fans on the mother plant and have each division be at least 3 fans. Unless it is huge I recommend digging up the entire plant and then replanting the parent. Some recommend cutting with a spade or knife, but you will lose a lot more of the plant this way. No matter what you do you will lose a few roots, and maybe a fan or two. If you chop off the top part of the fan replant the crown anyway and it will likely grow next year. As you start to remove the soil you will notice that you can begin to tease or pry the fans apart, breaking a few roots that join them. Leave the fans that you plan to plant together attached if you can. If they separate it’s not a big deal though. Remove the dead foliage and debris from around the crown and especially if you plan to move them to a different garden rinse them. This will prevent moving any weeds or insects hiding in the soil and in that stuff around the base.

Now sit back and enjoy the show.

To see all of the daylilies offered by Catrina’s garden click here.

Click here to learn how to plant your daylilies.

Planting Your New Daylilies

Daylily Bama Bound1Daylilies are the ideal plant to purchase bare root. They are tough, and the way the root system develops will help them travel well. The thick swellings are actually tuberous roots. They store energy for the plant and help them if they are out of the ground or living in a pot for a while.

Here at Catrina’s garden we do not store your daylilies over the winter.  They are kept in the ground until spring when we dig them the day before we ship them. After digging them we clean, trim and label them, then we let them dry for a few hours before they are packed. All of these steps are important.

Daylily Bright Sunset (5)1All soil is cleaned from your daylilies. Although daylilies (especially those grown in the north) don’t have many disease or insect problems; removing the soil prevents nearly any chance of moving soil insects and weeds from one area of the country to another.

So why do we cut them back? Even though daylilies are really tough, all plants are shocked when transplanted and will need to go through a recovery period. Cutting them back has 4 purposes. It allows us to fit more plants in the box. It makes it easier for us to see the crowns when dividing. Most important is that it is better for the plant. There will be less foliage that the plant needs to support while recovering, and lastly there is less water lost from the plant when there is less foliage. When you plant your new plant it is normal for the outer leaves to dry up and turn brown and you will notice new green foliage coming from the center of the crown.

Daylily Indian Giver1Your plants are dried before they are packaged so that they will not rot or grow any mold while they are in the box. They are labeled for obvious reasons…so that you know which is which, since you can’t tell them apart otherwise…until they bloom.

The most important thing when receiving your plants is to plant them as soon as possible. You may want to start finding a spot for them and getting the soil prepared when you hear from us that they are being shipped.

Daylily Jo Barbre (2)1In choosing their new home there are four things to be considered

  • Daylilies do best in full sun. They will not likely die if you plant them in the shade, but they will not bloom well. Please plant them where they get at least 6 hours of sun for best blooming. You could consider planting your dark purple or red varieties in partial shade. They can get spots from too much sun especially if they are wet. Some think a little morning shade allows them to dry off the dew before the sun hits them and some think afternoon shade keeps them out at the hottest part of the day.
  • Soil Type – Daylilies will truly grow in almost any type of soil. They will flower better in a rich fertile soil. Adding some compost will help a clay soil more become more friable and will help sandy soil increase water retention.
  • Poor drainage will only be a problem if it is severe. You don’t want your daylilies standing in water, they could rot. If you have really heavy clay or are in a low area consider a raised bed.
  • Space – Give them a little space. If they are too close to trees, shrubs, weeds or other daylilies they could be robbed of water and nutrients. You don’t want to plant different varieties too close together as they will get big and grow together and you could lose track of which variety is which or a more vigorous variety could “take over” a weaker one. Do feel free to interplant with other perennials. I recommend planting them at least 18 inches apart, or a little wider.

Daylily Little Missy (4)1When preparing the spots for your daylilies work the soil down at least a foot to loosen it up. Your hole should be bigger than the root mass if possible.

Because your plants have been dried and have spent some time in a dark box you may want to put them in a bucket of water for a few hours before planting them. Some people don’t agree with this. If your plants don’t look dry at all this may not be necessary. The big thing here is not to leave them in the water too long…over night at the longest. Leaving them in water longer than this could lead to rot. If you can’t get them planted right away bury the roots in a bucket of damp sand or plant them temporarily in a pot or close together in the ground. Please keep them watered.

Daylily Little Rusty and Ice carnival1Some people like to add a weak solution of fertilizer to the water. This could help but be sure that it is not too strong or it could burn them. We don’t use fertilizer because we garden organically. When I purchase my own daylilies I put a small shovel full of compost in the water to make a compost tea. If they don’t look dry it is perfectly fine to plant immediately and water well.

Water them well…ah yes; that is the key. Daylilies being the strong carefree plants that they are need little supplemental water in most areas, once established. They do however need frequent watering when they are first planted; especially if planted in the summer, or in hot, dry climates.

Daylily Siloam Doodlebug1So how exactly do you plant them?

  • Make a little mound in the center of your hole. This is because the daylily has a crown and roots that are fanned out around it. You want the roots to be draped down deeper than the crown and the crown should be sitting at the same height in the soil as it was previously.
  • You can see how deep to plant them because the part that was under the ground before will be white and the part that goes above the ground is green.
  • The crown should not be more than an inch below the surface.
  • Firm the soil around the roots to remove air pockets but you don’t have to pack it super tight.
  • The new plant should be the same height as the surrounding soil, but you can make a bit of a soil ring around it so that the water doesn’t run off.
  • Water well…oh yeah, we already said that.
  • Label your plant – Some people don’t care about the names of their plants, but even if you don’t, you may want to know what color it is. Just use the name. Even if you don’t care about it now you may find that you do in the future. Daylilies can lose much of their value if they are nameless. I have a few from when I first started gardening that are lovely but I can’t sell them because I don’t know their true identity.

Daylily wild ruffles (5)1Some things to remember:

  • Diploids including most spiders and miniature daylilies will have much smaller fans than tetraploids. This is normal. We always send at least 3 fans of daylilies that have small fans, many times more. For large tetraploid daylilies you will always get at least two large fans, many times three. Usually, the limiting factor will be the size of the box.
  • Daylilies that grow in the far north may be smaller in size than those grown in the south. Really; they will perform just as well if not better, especially for those of you that live in the north. They also have the benefit of not having troubles with rust. If you get a huge fan from Florida or Alabama you will notice that it will be smaller before too long when you plant them in the North.
  • Your new daylilies probably won’t bloom the first year. This is normal. Remember, they are recovering. Some people even cut the scapes off the first year to help the plant get a strong start. Scapes are the stalks that produce the flowers. I like to leave just one scape to make sure that I got the correct plant.
  • Please judge your new plants by the roots not the leaves.
    • Enjoy your new daylilies.

To see the daylilies offered by Catrina’s Garden click here.

Click here to see how to care for your established daylilies.

Grow Great Basil

Basil is easy to grow. If you are growing plants to put outside in the garden, here in Wisconsin you will want to start about now late February or early March). It is one of the first things I start along with parsley, peppers, eggplant and some early flowers like pansies and snaps. Wait a little while for the tomatoes or they will get too big too fast. (This is a gallery. Click one of the pictures to open it and click in the grey area to close)

Some of these pictures came from here.

Most places that sell garden seeds will have some kind of basil. Usually it is “sweet basil” which is just plain old regular green basil. It’s good and is a good fast, grower but there are so many other kinds. We will discuss the different varieties in detail in another blog, but do try lettuce leaf. Its leaves are twice the size of sweet basil. Try one of the many types of Thai basil. The flavor is a little more pronounced and the stems are purple. “Purple you say”; yes, if you like that try one of the varieties with purple leaves. They are very pretty and you won’t notice spotting as much. They make beautiful pink infused vinegar. Other varieties to try include lemon, lime, or one of the miniature types. I recommend a soil less seed starting mix as basil can be susceptible to fungal diseases.

Clean your potsYou have some choices; the little expandable pellets, small pots with the soil less mix or, you can use a larger pot with a nice rich soil on the bottom and then a layer of the soil less mi on top. If you use small pots you will have to transplant them into bigger pots as they grow. Use a clean pot. I wash mine in the dish washer. Fungal diseases can live from year to year on your pots.

Basil seeds1If the seed is fresh I usually put about 3 seeds in each pot. Space them out a little if you can. Put in a few more if they are older. If your soil is dry spray it with a mist bottle before you start. Bottom watering works best for seeds and really young seedlings and pre-misting the soil helps draw the water up better from the bottom. Bottom watering prevents the seed from being washed away and protects fragile young seedlings. Basil seeds do like to be covered a little bit. Either sprinkle them with a little more soil or poke them down with a tooth pick or something.

Be sure to label your seedlings. I like to use pencil. It doesn’t fade as much as markers.

Sprout seeds with bottom heatBasil loves warmth and they don’t need light until they sprout. They do best if you cover them to keep the moisture in and then put them somewhere that they will get bottom heat. The sell matts especially for this but I find that the heated tile floor in the bathroom works great. The top of the frig or the heating coils that are used to melt snow from the roof are some other things that I have heard of.

The next step is important. Check them every day. Water as necessary, by filling the bottom tray. You want them to stay moist but not overly soggy. When you see green it is time to move them into the light.

Spring Seedlings1Then you just let them grow. They need as much light as possible. If they don’t get enough light they will get tall and skinny and will have week stems. Either keep them in the brightest window with direct sunlight or use artificial light. Again, they sell set shelves that are set up especially for growing seedlings. You can however set up a growing station anywhere that you can hang lights. There are special bulbs for growing plants. They do help I think, but I have had good luck with standard shop lights. When using this method the lights should be lowered and raised as the plants grow so that the light is 2 to 6 inches above the plants. Don’t leave the lights on 24/7 though, plants have adapted to that period of darkness called “night” and some even bloom and or develop according to how many hours of light they get. I use a timer that turns the lights on and off at 12 hour intervals.

Some of my seedlings go out into the greenhouse early so that they can start to get used to the temperature fluctuations in preparation for moving outside but not the basil. Keep growing it in a nice warm spot. You will need to harden it off eventually to go outside but don’t even think of putting basil out until it is nice and warm. It’s the last thing we pant outside.

As the seedlings grow use a fan to circulate the air around your plants. This makes them stronger and helps ward of growth of fungus.

One more thing that makes basil different than how I grow most of the rest of my seedlings, don’t thin it. Tomatoes, peppers, Cole seedlings; all of these I would select as they grow, and keep the strongest seedling. Not basil, you can leave a little clump of them.  Not tons of seedlings, but up to 5 in a pot and then later planted into the garden together is fine.  This gives you more stems to harvest from and makes your plant(s) appear lusher. Basil doesn’t have a very dense root system so it doesn’t mind, but do give it some extra compost or other fertilizer when you plant it as it likes a nice rich soil.

Tomatoes and basil1Plant them out when there is absolutely no chance of frost. Water your plants regularly and harvest frequently.  This helps them become bushier. When you harvest take the top few stem segments just above where two leaves are attached. When you do this to new stems will grow out of the leaf junctions. Don’t just pick the leaves.

Now I have to wait until harvest time to write about making pesto.

For some more interesting talk on basil read “All About Basil”.

For the History of Basil click here.

All about Basil

Basil…either you love it or you hate it. Maybe if you hate it it’s because you haven’t really had “good” basil. Dried Herbs old1 Is this what the basil you are used to looks like? There is nothing wrong with dried basil, but if you use it this is what it should look like. Dried Herbs Fresh1Dried herbs don’t have a really long shelf life. Depending on where you store them the will only last about a year. When they have lost their bright green color and no longer have a nice aroma you may as well toss them. Old herbs won’t hurt you but as my dad says “they taste like grass”.


So where should they be stored? Well, dark and cool is best but you really don’t need to keep them in the refrigerator; just not right over the stove. Keep them in a container that is tightly sealed.

Freshly dried herbs are great but if you have never had fresh herbs you are really missing out. Here in Wisconsin, Basil is an annual herb. Basil and other annual herbs should be treated like fresh flowers. Many annual herbs can be stored for a short time in the frig.Fresh Basil1 If you put a piece of paper towel in the bag with them it will absorb moisture and keep them fresh longer. some people keep basil in the frig, but I wouldn’t recommend it. Basil will turn black if it gets too cold or will get dark spots. It’s still okay to eat if it’s not mushy; just not pretty.  Instead harvest it fresh (ideal) for each use or if you purchased it cut then put it in a cup or vase, just like it is a cut flower. It really can be quite beautiful. If you see it all the time, you will be more likely to use it too.

So, you could grow your own; we’ll talk about that next time.  However, you can buy it too. “It’s so expensive” you say. Well, yes, often times in the grocery store it is. Look for it at farmer’s markets and/or your local Asian market. If you find it for a good price get a lot and preserve it.

Thai basil flower1By the way, you can eat the flowers too. Try them, they are good; and also pretty on a salad.

Next click here to learn how to Grow Great Basil.

For the History of Basil click here.


Root Cellar Carrots – Maple Glaze Recipe

Purple Haze carrots and sugar snack carrots I got a little carried away with the carrots this year. We had quite a few different colors. The gold and white varieties are pretty but I really like the dark red and purple ones. The have way more beta carotene than a standard carrot, and are simply beautiful on the plate. Having unusual colored veges is always a great way to get people talking at the pot luck too. These are Purple Haze and Sugar Snack Carrots at the peak of the season.

Holly with carrots1Carrots are such a fun crop for kids to grow too. They just love all the different colors and are more likely to actually eat them if they saw them being produced.

This time of year all of the best and most beautiful veges are long gone. The sweet crisp, thin skinned carrots don’t store very well, but I still had a bucket of Danvers and Bolero carrots which I grow for eating later in the winter. I do have a root cellar, so that helps. It’s best to store them at a temp from the high 30’s to the low 40’s. The trick is to keep them moist enough so that they don’t shrivel up but not so moist that they rot. I use a mix of half sand half garden soil. Whatever you do don’t wash them before you store them, you can remove the leaves, but don’t cut off the tops and when you bury them in the sand, try to arrange them so they don’t touch. These storage varieties have more fiber and starch but bolero has a thinner core than Danvers, and both of them are great cooked; much better than anything you would get in the grocery store this time of year.

So I dug the last of them out and this is what I made with them. The maple syrup and orange makes up for these storage carrots being a little less sweet. We cook our own maple syrup here in Wisconsin; not for production or sale…yet. We just do small batches for ourselves and for gifts.

1Maple Syrup Sap Dripping 5You could use store bought syrup but nothing beats pure 100% maple syrup. Check back for more on “sugarin” in spring.

So here’s the recipe:

Maple Glazed Carrots

½ cup pure maple syrup

1 cinnamon stick

¾ cup orange juice – You can use a little lemon or lime juice in place of the orange if you like it a little more tart

2 oranges or one small can of mandarin oranges

¼ cup water

1 ½ tbsp. cornstarch

1# sliced or diced carrots

1-2 tbsp. butter (you can use olive oil if you are worried about it)

½ cup Parsley (you can use fresh mint too if you have some. Pineapple or other fruit flavored mints are especially good.)

Salt and Pepper to taste

Maple Glazed Carrots - CopyFirst make the maple the glaze: Place maple syrup, cinnamon stick, orange juice and oranges in pan and simmer lightly. Break up the oranges with the spatula. In a cup, stir together water and cornstarch until smooth. Add the cornstarch slurry slowly into the maple mixture, and continue to simmer and stir over low heat until it is thickened. This may take a while; be patient and don’t turn up the heat too high. Remove the cinnamon stick and any skins and pith from the oranges.

Sauté the carrots in the butter or oil until they are starting to get soft; how soft is really up to you, I know people who insist that the carrots aren’t done unless they are really soft, I tend to like them a little firmer.

Add the maple glaze, salt, pepper and herbs. If you use fresh oranges you can zest them before you peel them and then add the zest at the end for extra bright citrus flavor. This makes 4 to 6 servings.

Enjoy a taste of summer from your root cellar.

Is it an Herb or a Spice?

My herbs are looking pretty good, even though it is very early in the season. Here on the border of zone 3 and 4, I moved some of them to the in-ground beds of my greenhouse so that I was able to use them all winter. After doing this for a few years, I learned that it is a good idea to dig them up earlier so that they can get a good root system developed before the cold weather sets in. This way they will live through the winter…even Rosemary.  Soon they will be moving back out to the herb garden.

Garlic Chives allium tuberosum

Garlic Chives allium tuberosum

We (meaning most cooks that I know) often use the words herb and spice as though they were the same animal. Herbs and spices both come from plants. Herbs and spices are both used to flavor food and add that all important aroma. Both are best when used fresh, but they can be saved by drying or in some cases freezing. However, don’t be fooled into thinking that this will keep them forever.

Powdered Spice (2)

Powdered Spice (2)

So, what’s the difference? Herbs usually, but not always, come from the leaves of herbaceous plants. What’s an herbaceous plant you say? Well, it is a plant that is non woody. This is why I say usually, but now always. I think rosemary and thyme among others can be a bit woody. Herbs usually are used in larger amounts than spices. There are some that say that an “herb” is any “useful” plant. The “use” doesn’t have to be for cooking. It can be used for medicinal purposes, for dying, or in any other useful way. In the middle ages they threw them on the floor to cover the stink in the house. The term “herb” is also used by botanists to mean simply that the plant dies down, and may not even be referring to its use. Most herbs originated from temperate climates like England, Italy, France, and yes; the “new world”. Some examples of herbs include: parsley, sage, rosemary and thyme (thanks S&G), but also basil (my favorite), oregano, marjoram, chives and mint, to name a few.

Thyme

Thyme

Spices on the other hand come from parts of the plant other than its leaves, like the bark, roots, seeds, fruits or flowers. To confuse you a bit, they can come from “herbaceous” or woody plants. The flavor of spices is, as a general rule, a lot stronger, so again, usually but not always, less is used. Most spices come from warm tropical places. Sorry dear, you can’t plant a Catrinas-Herb-Garden-159x300cinnamon tree in your yard here in Wisconsin. There are a few spices that actually help food keep longer as well as adding flavor. I suppose this could be helpful in a warm tropical climate. Examples of spices include: Cinnamon (this is the bark of the cinnamon or should I say Cassia tree-more on this in a future post), nutmeg, cumin, coriander and dill (all from seeds), Vanilla (from the underdeveloped fruit of an orchid), Ginger (a root), and Cloves (from a flower bud).


Some plants are both herbs and spices. The leaves of Coriandrum sativum are the source of cilantro (herb) while coriander (spice) is from the plant’s seeds. Dill is another example. The seeds are a spice while dill weed is an herb derived from the plant’s stems and leaves. In case you were wondering, salt is not an herb or a spice, it is a mineral.

Whole Spice (2)

Whole Spice (2)

Heartsease

pansy-very-dark-redI had heard this term before moving “up north”. But when I got here one of the first friends that I made used this as her “computer name” so I became more accustomed to the name.

This diminutive little pansy known to all as Jonny-jump-up, love in idleness or herb trinity is call heartsease because it is said to mend a broken heart. Shakespeare makes reference to this in A Midsummer Night’s dream. Oberon dispatches Puck to gather the “little western flower that maidens call Love-in-idleness”. Cupid’s arrow falls upon the plant that is “before milk-white, now purple with love’s wound”. Oberon and Puck are able to control the fate of other characters in the play by using heartsease; “on sleeping eyelids laid, will make or man or woman madly dote upon the next live creature that it sees.”

Pansy Jolly JokerThe scientific name Viola tricolor tells us it is from the family violaceae (the violets) and tricolor because it is usually purple yellow and white. Violas are a close relative, but all of our wonderful longer lived pansies were developed from this plant. Pansy comes from the French – Pensee meaning thought or remembrance. Here is why in Shakespeare’s Hamlet Ophelia says “There’s pansies, that’s for thoughts”.

Some say all pansies can be called heartsease, but viola tricolor is the original one.  Pansies are among our edible flowers and are sometimes candied on fancy deserts, frozen into ice-cubes or thrown into salads.  Purple-and-white-pansy

They have been used forever as a mild treatment for pertussis and bronchitis due to their expectorant properties; cystitis, polyuria and dysuria due to their diuretic properties, and they are also a mild laxative, so don’t eat too many of these little cuties on your salad. They also contain salicylic acid, salicylates and rutin, so they have anti-inflammatory properties and can be used to treat gout and rheumatoid arthritis.

Used as a compress or ointment they treat eczema, psoriasis and acne. Although they are usually used in combination with other plants by herbalists, this is truly an amazing little plant.

So, what is the secret of growing Heartsease? There is none! Just ignore it and it will “jump up”. The fancier pansies will self-sow too, and will sometimes, but not always come true to seed. Of course you can find them at any garden center in early spring, but if you want a certain variety you may want to consider growing your own. If you do, keep these tips in mind; first start with fresh seed. Start early, I usually try to get mine going as soon after the holidays as I can.  They take 6-8 weeks to be large enough and can be set out quite early, as they are frost tolerant.  As with any seed starting use a soilless mix and keep them moist with bottom watering. But this difference with pansies; they should be kept cool (like about 65 degrees). No bottom heat for these darlings.  Another difference from many flower seeds is that they need darkness to germinate, so cover them with a little soil and throw the daily news on top of them until they sprout, then bring them into the light. Lastly, my favorite tip, grow them through spring as most people do, but then when summer comes and they start getting leggy and not so beautiful, don’t pull them out. Instead cut them waaaaaay back. They will all but disappear under your other flowers, but then in fall they will jump-up again for 3 more months of cuteness.

Walter Savage Landor says it all in this little poem.

Heartsease

There is a flower I wish to wear,

But not until first worn by you,

Heartsease of all earth’s flowers most rare;

Bring it; and bring enough for two.


Some may call this plant a “lawn weed”. But how can you not love a cute little plant that requires no care and heals a broken heart?

Catrina

Click here to read about Pasque Flower for Easter

Try this link to read about Early Spring flowers

If you would like a few more pics of Early Spring Bulbs click here

Promise of Spring – Start Now!

Layering Bulbs – Small garden or no garden – No Problem!

Tulips and daffodils are what most people think of when they talk about spring bulbs, but there are so many more to choose from.  Most bulbs require very little root space so they can be planted quite densely and thus are perfect for those that have small gardens. They also don’t take up a lot of space in the garden once they are growing because most die back after blooming and have tall straight stems. Because flowers are generally pretty large and showy compared to the amount of foliage, you get a lot of bang for your garden space buck. In a one to two square foot hole you can get a patch that will flower from early spring well into summer.

First step; pick your bulbs. Usually but not always bigger bulbs will have bigger flowers and little bulbs; you guessed it smaller flowers. The bigger ones generally, but not always bloom later. So, even if you don’t know the exact bloom time for your bulbs you can be pretty safe planting the bigger ones on the bottom and decreasing the size as you move up in your layers. Do your research on bloom time if you want to be sure that you will always have something in bloom.  There are many different bulbs that could be included but the main categories are:

• Lilies and Alliums (for summer bloom)
• Narcissi and Tulips (for spring bloom)
• Muscari, Scilla, Iris reticulata, Crocus and other early spring bulbs
These are the “classic” bulbs that are used but please; check out your catalogs for some more unusual offerings!

You don’t have to use all of these layers; just two layers would also be fine. Layering also works great over a larger area. You can mix and match your bulbs however you like…be creative. If you use 2 different types of tulips (for example) in a layer, you may lengthen your bloom time a little bit. Do use your “design sense” however. If you use too many different things in one area things can look a little bit chaotic.  Oriental-lily-Loreto

How many bulbs should you buy?  You have to think about if you care about next year’s show, or what you will see in 3 or 4 years. How often do you want to dig it up and redo it? Plant more to get a great show the first year, and less if you want to take the lazy way out and not have to dig them up so soon do to overcrowding. Here are some approximate numbers.  In a 2 square foot hole you could fit, about 5 lilies, 7-12 daffodils, tulips or alliums (or any combination of them) and 20-30 small bulbs. The size of the bulbs is also important. You can fit fewer big top size bulbs than small offsets…duh.
What colors should you use? Well, what colors do you like? Work with the colors of other things in your garden. Too many colors can cause the eye to jump around. Usually you don’t have to worry about this however because your bulbs will be blooming at different times.
All of your plants don’t have to be bulbs.  It is fine to use a ground cover such as a quick-growing annual or low growing perennial in the top layer.  Some ideas of things to use here are parsley, alyssum, creeping sedums, creeping veronicas.  These ground covers serve 3 purposes; they add beauty to your planting in-between the flowering of the bulbs, they “mulch” the soil, conserving moisture and preventing weeds, and they can help to hide the foliage of the bulbs when they are done.
Layering bulbs is similar to making lasagna.  Layers of drainage material, bulbs, soil and ground covers or mulch are used instead of sauce and noodles.

The first step is to find a bare spot in the garden.  Check out your perennials in the summer and mark the spot as it can be difficult to remember in fall when the perennials are finished.  Since you will be planting densely the spot really does have to be empty of other plants to begin with.
Another benefit of planting all of your bulbs in one spot is that it will be easy to find them in fall when you want to divide them.  Scilla-mischtschenkoana
Here is your step by step “How To”:
• Dig a deep hole at least 12″ but 14″ is better and at least 16-18″ wide (remember you can use a larger area). The hole does not have to be perfectly round.  An irregular sized hole will give you a more natural appearance.
• Remove the soil and mix it with lots of good compost and add any organic or other fertilizer that you choose to use. Move the soil mixture into a bucket.
• Place some drainage material like coarse sand in the bottom of the hole, 1-3 inches is good depending on how sandy or clay-like your soil is.
• Next fill in about 2-3″ of the soil mixture.
• Now you can start to plant. Large bulbs go first. Cover with about 2″ of your soil mix.White-Tulip
• Next plant mid-sized bulbs. You try to fit them in between the bulbs below but don’t worry, emerging shoots of the lower layer bulbs just bend around anything they hit sitting over their heads and keep on growing.  Again cover with 2″ of your soil mix.
• Then plant the smallest bulbs that are also the earliest blooming. Finally cover with the last of your soil mix. It should be about 2 more inches and the ground should be level.
• After the blooms have faded, be sure to let the foliage die back naturally because this is how bulbs build up their strength for next year. It is okay to remove the flower stalks when they are finished to keep the garden looking tidy. You can also remove old foliage when it starts to yellow. It is green foliage that is nourishing the bulb for next year. It’s okay to bend it down a little if you don’t like the way that it looks.
• Water a little more often in the first weeks after you plant your bulbs to help them form their roots.
Please be careful when removing foliage from bulbs or picking cut flowers.  Many bulbs especially daffodils, tulips and hyacinths can cause severe contact dermatitis in susceptible individuals. Wear gloves and be very careful not to drip the sap from the stems on your skin.  Many workers in the bulb industry will tell you that “lily itch” is no fun.

Don’t worry; certain bulbs may be planted a little deeper than they would if you just planted them by themselves. The stuff in the hole will provide better protection winter heaving and at worst they will bloom a little later than your neighbor’s.

Daffodil-tazetta-Canary-BirdMany people also use bulbs for layering in containers.  This makes a beautiful display for your porch or patio.  Here are some things to remember about planting bulbs in containers.
• The bulbs can touch each other but should not touch the sides of the container.
• In Wisconsin even hardy bulbs will probably not survive the winter in containers.  You will have to either say good-bye to them or plant them in the ground.
• Bulbs like tulips and daffodils need a period of cold to bloom so either put them in the refrigerator or you can try putting the whole pot in a very cold but not freezing garage or basement.
• This is a perfect way to use bulbs that are not hardy in our area like elephant ears, cannas, callas, caladiums, and tubers like dahlias.  Once the display is finished you can put the entire pot in a cool dark place in your basement and bring it out in spring.  This works best if you have a sunny place indoors where you can bring them out and get them going before the season starts.
• Bulbs in containers will need extra fertilizer.
• Your contained bulbs will eventually outgrow your pot; some quicker than others, and you will have to replant.
• Planting in a pot is a great idea for certain bulbs that are sometimes eaten by rodents like crocus, and tulips.
• Make sure your pots have drainage holes (very important) and add additional drainage material in the bottom of the pot.
• It’s not a good idea to leave valuable clay or ceramic pots outside.  Freeze thaw cycles can crack them or cause them to flake.  Cement or plastic pots are fine outside over the winter.

Happy planting!

Catrina


Page 45 of 45

Powered by WordPress & Theme by Anders Norén